Disclosure: This post may contain affiliate links, meaning I get a commission if you decide to make a purchase through my links, at no extra cost for you!
If you’re planning a trip to Yellowstone in June, let me tell you — you’ve picked a really great time to go.
By June, most of the roads are finally open, the weather is lovely, and it’s not nearly as crowded as it gets in July and August.
That said, June comes with its own quirks, and there are a few things you really need to know to make the most of your visit.
I’ve been to Yellowstone in June and I’m sharing everything I learned — including a few things I wish someone had told me before I arrived.
Here are my top travel tips for visiting Yellowstone in June!
1. Wear a Hat and Sunscreen
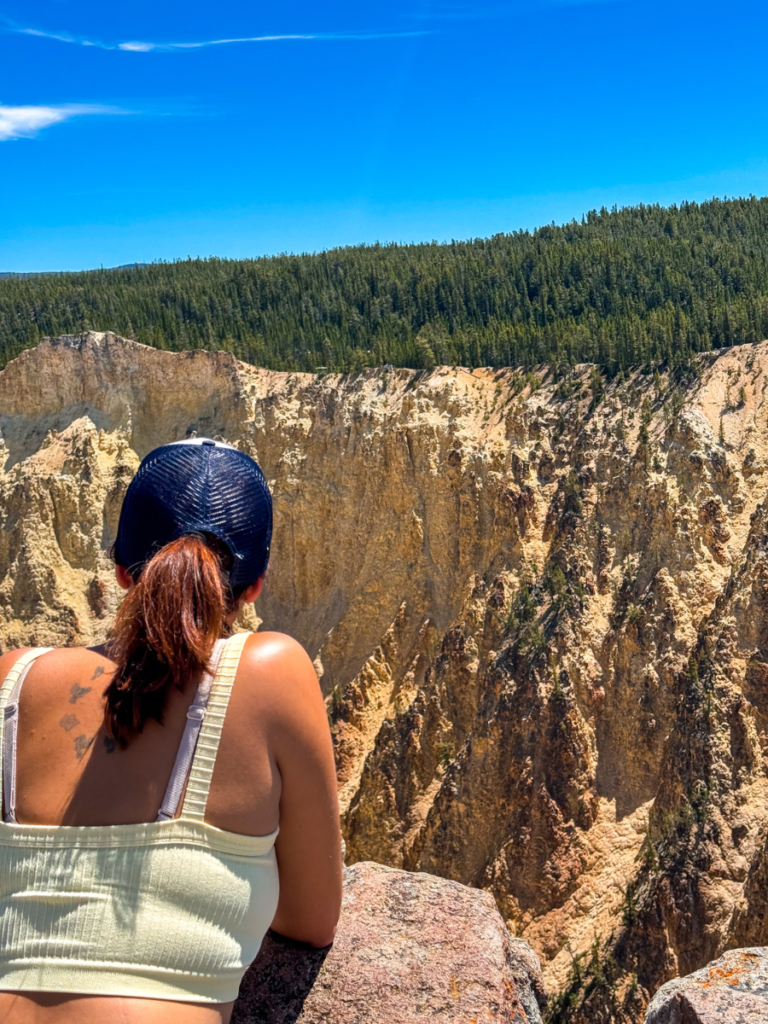
Yellowstone in June is usually very sunny during the day and I completely underestimated this.
I showed up without a cap, and within a few hours I was already inside one of the park’s merch stores buying one because I just couldn’t handle being out in the sun without it. Don’t make the same mistake I did!
You’ll be spending a lot of time outside, walking on boardwalks, hiking to overlooks… and a lot of the time there is little to no shade.
The UV rays at altitude hit differently too, so sunscreen is non-negotiable, even on cloudy days.
💡 PRO TIP: Pack a hat you actually love wearing, because it’ll be on your head basically all day. A wide-brim hat or a baseball cap both work great. Apply sunscreen every morning before you head out — and reapply if you’re out for a full day.
2. Dress in Layers
This is one of the most important tips I can give you for June in Yellowstone.
The weather is completely unpredictable, and you can genuinely experience four seasons in a single day. You might be in shorts and a t-shirt by midday, and then reach for your fleece later in the afternoon when the temperature drops or you gain some elevation.
Mornings can also be cold — especially if you’re getting up early (which you should, more on that below).
Some of the higher-altitude areas stay cool even during the day.
At minimum, you’ll want a sweater or light jacket, and a rain jacket or windbreaker. Trust me — you’ll use all of them at some point.
💡 PRO TIP: Don’t bury your layers in your luggage. Keep them on the back seat of the car so you can grab them quickly. The weather in Yellowstone can change really fast.
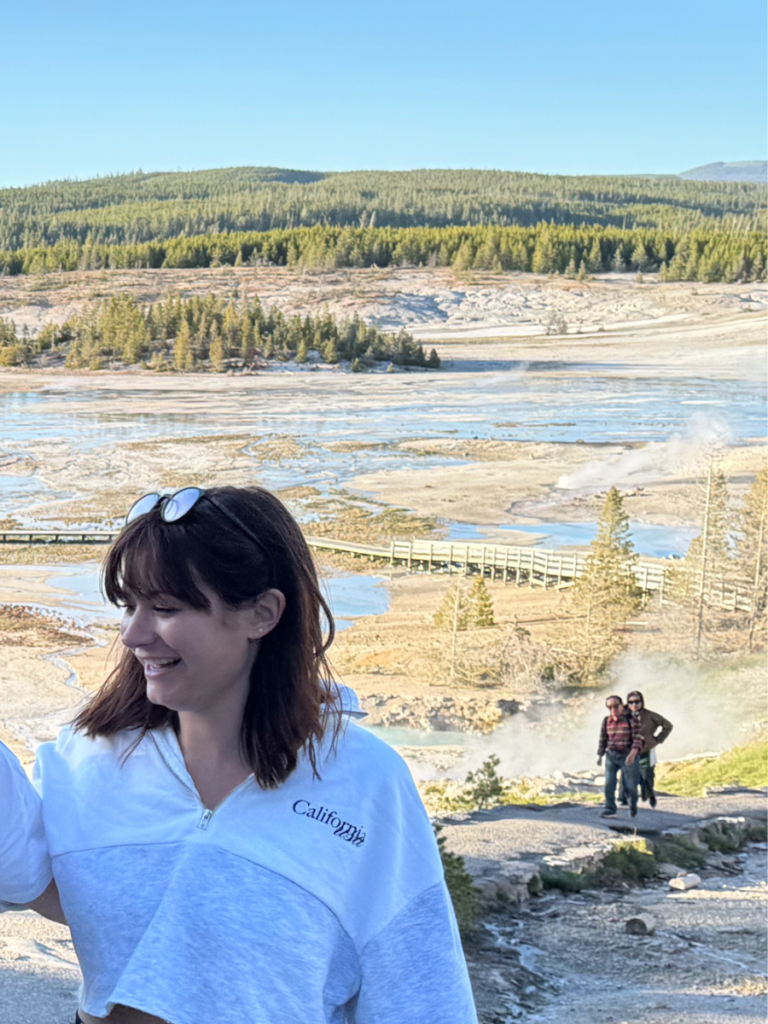
3. Check Road Openings Before You Go
One of the best things about visiting in June is that, by this point, most of the park’s roads are open — unlike earlier in spring when many are still closed due to snow.
However, “most” doesn’t always mean “all.” Some higher-elevation roads may still be on a delayed opening schedule, especially in early June.
Before you head out each morning, it’s worth checking the NPS website or stopping into one of the visitor centers to get the latest road conditions.
The rangers there are always up to date and incredibly helpful.
💡 PRO TIP: The visitor centers are a goldmine of information — seriously, don’t skip them. They’ll give you the free Yellowstone newspaper, which has the schedule for all the ranger-led activities. These are completely free and absolutely worth doing if you can fit them in.
4. Get the Guide Along App

Okay, this one is a total game-changer, and I can’t recommend it enough.
The Guide Along App is an audio driving tour app that I discovered while planning my Canada trip online.
Honestly? I wasn’t totally convinced at first. But then I tried the free sample when I arrived in Calgary and I was completely blown away. It is truly exceptional. They have tours for most national parks in the US and Canada.
For Yellowstone specifically, it’s one of the best things you can do.
You download the app, purchase the Yellowstone package, plug your phone into the car, and as you drive around the park, you get audio commentary that explains everything you’re passing — the geology, the history, the wildlife.
What I love about it is that it’s not constant.
You can still chat, listen to music, and just enjoy the drive.
But whenever you reach something interesting, all the context is right there. They even give you tips on where to park.
💡 PRO TIP: Download the Guide Along App and buy the Yellowstone package before you enter the park. Signal can be really patchy inside, so it’s best to have everything downloaded and ready to go in advance. You can find more of the apps I recommend for Yellowstone here.
5. Book Accommodation in Advance

Accommodation in and around Yellowstone is limited — and it goes fast, even in June.
Inside the park, there are lodges and campgrounds, but they’re expensive and book up months ahead of time. Campgrounds especially need to be reserved well in advance.
If you want to stay inside the park for at least one night (which I genuinely recommend — there’s something magical about waking up right there), you’ll want to sort this out as early as possible.
If you’re looking to save a little money, West Yellowstone and Gardiner are both solid options just outside the park. But here’s the thing — even those fill up quickly. Don’t leave it to the last minute, even for June.
6. Get Up Early

I know, I know — you’re on vacation. But trust me on this one. Getting up early in Yellowstone is absolutely worth it, for two big reasons.
First: wildlife. Bears, wolves, elk… are most active at dawn, when they come out to feed. The earlier you’re out, the better your chances of an incredible sighting.
This is especially true in Lamar Valley, which is one of the best wildlife-watching spots in the park — get out there at as early as you can and you will not regret it.
Second: even though June is quieter than peak summer, the park still gets busy. Popular spots like Old Faithful can get pretty crowded as the day goes on.
If you’re there early, you get to enjoy everything without the masses. It makes such a difference to the whole experience.
💡 PRO TIP: Try to be out by 7 or 8am. Bring a thermos of coffee and enjoy!
7. Plan for at Least 3 to 4 Days

Please don’t try to do Yellowstone in a day. Yellowstone is absolutely massive — we’re talking 3,468 square miles.
It takes about four hours just to drive around the full Grand Loop without stopping anywhere. One day is simply not enough, and even two days means you’ll be rushing through everything and leaving a ton unseen.
Three days gives you a solid amount of time to hit the highlights without feeling like you’re sprinting from one thing to the next. Four days is even better — it lets you slow down, do some hikes, catch a sunset or two, and really soak it all in. If you can swing it, go for four.
💡 PRO TIP: Not sure how to structure your time? Check out my one-day Yellowstone lower loop itinerary and my two-day Yellowstone itinerary from the north entrance for inspiration on how to make the most of every day.
8. Visit Grand Teton National Park Too
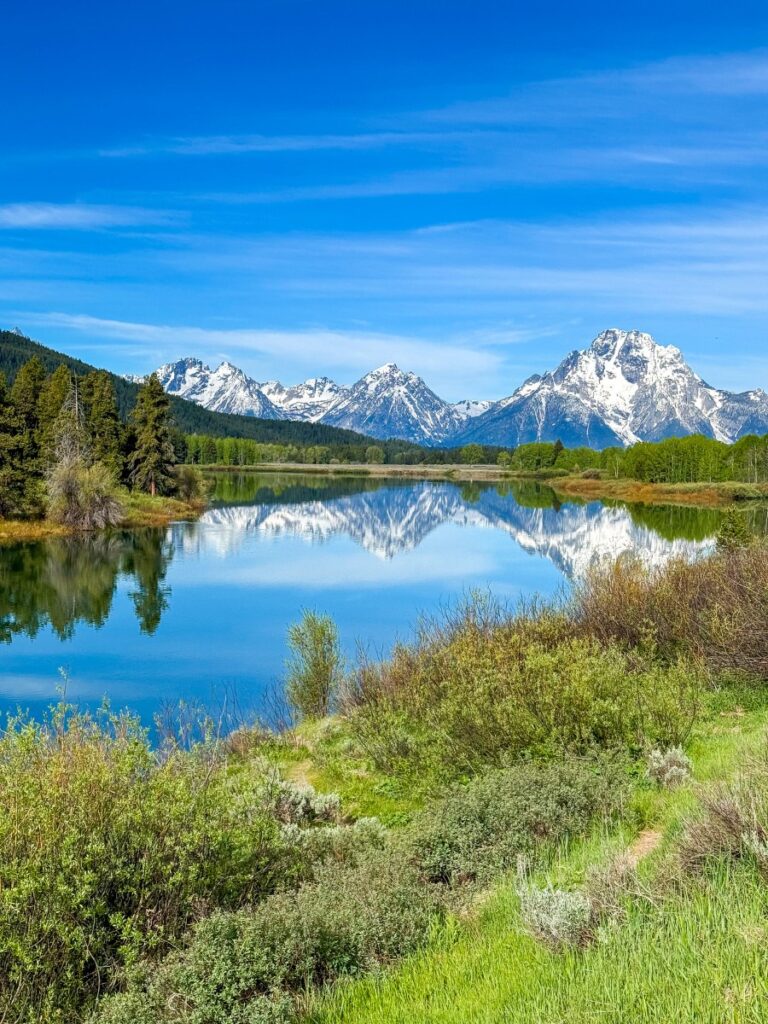
Grand Teton is so often overlooked because everyone’s focused on Yellowstone — and it honestly drives me a little crazy, because it is stunning. It’s only about an hour’s drive from Yellowstone’s south entrance, and it would be such a shame to be that close and not go.
The Tetons are dramatically different from Yellowstone — jagged mountain peaks reflected in still lakes, wide open valleys, and some of the most iconic photography spots in all of America.
Places like Oxbow Bend, Mormon Row, Schwabacher’s Landing, and Jenny Lake are truly special. Even a single day there is enough to fall completely in love with it.
If you have an America the Beautiful pass, it covers entry to both parks — so there’s really no excuse!
💡 PRO TIP: Check out my Grand Teton one-day itinerary for everything you need to know about visiting. And check out all the things to do in Grand Teton if you want to spend a bit more time there.
9. Stay Hydrated — and Bring Gatorade
This one is easy to overlook but so important.
Yellowstone sits at around 8,000 feet in elevation, and even if you’re not doing anything too strenuous, the altitude can still get to you.
Dehydration happens faster up here than you’d expect, and it can sneak up on you fast.
Drink water constantly throughout the day.
And here’s a tip I got from a park ranger at the visitor center while I was struggling with altitude headaches: Gatorade.
I was skeptical at first, but I tried it and it genuinely helped so much. The electrolytes make a real difference. If you know that altitude tends to affect you, or even if you’re not sure, it’s worth throwing a few in your cooler.
💡 PRO TIP: Bring a reusable water bottle and refill it at the visitor centers throughout the day. It’ll save you money and reduce waste — win-win!
10. Bring Binoculars
If you show up to Yellowstone without binoculars, you will regret it. I learned this the very hard way.
I was driving through Lamar Valley when I noticed a whole bunch of cars pulled over on the side of the road. We stopped and asked someone what they were all looking at. A wolf. An actual wolf — one of the rarest sightings you can have in Yellowstone. And I had no binoculars. I couldn’t see anything.
Thankfully, a very kind man lent me his so I could finally spot it, but I was absolutely gutted I hadn’t come prepared. I bought a pair that same day. Don’t wait until you’ve already missed the moment — bring them from day one.
💡 PRO TIP: A decent compact pair of binoculars is more than enough for wildlife watching in the park — you don’t need to spend a fortune. Keep them in the car within easy reach so you can grab them quickly when something appears.
11. Get Bear Spray — and Learn How to Use It
There are a lot of bears in Yellowstone. Black bears and grizzlies — they’re around, especially in the more remote areas and on hiking trails. When you’re in your car, you’re safe.
But the moment you start hiking, bear spray is essential.
In all likelihood, you won’t ever need to use it.
But just having it makes such a difference to your peace of mind.
I spent a couple of days hiking in Canada without bear spray, and I was constantly nervous every time I heard a sound or spotted a paw print on the trail.
The moment I had bear spray clipped to my belt, I felt so much better. It’s genuinely worth it.
One really important thing: when you buy your bear spray, ask someone to show you how to use it. It sounds obvious, but bear spray is useless if you don’t know how to deploy it quickly and correctly.
And always keep it somewhere easy to reach — on your belt, not buried at the bottom of your pack.
💡 PRO TIP: You can’t bring bear spray on a plane, so plan to buy or rent it when you arrive. Most outdoor stores in West Yellowstone and Gardiner carry it, and some visitor centers do too. Renting is a great option if you don’t want to commit to buying.
12. Always Follow the Safety Recommendations
This one is simple, but it matters so much. Yellowstone is a wild place, and the wildlife is genuinely wild.
The rules about keeping your distance exist for a reason — both for your own safety and for theirs.
We want to protect these animals, not stress them out or put them in danger.
The official distances are at least 100 yards from bears and wolves, and at least 25 yards from all other wildlife — bison, elk, moose, you name it.
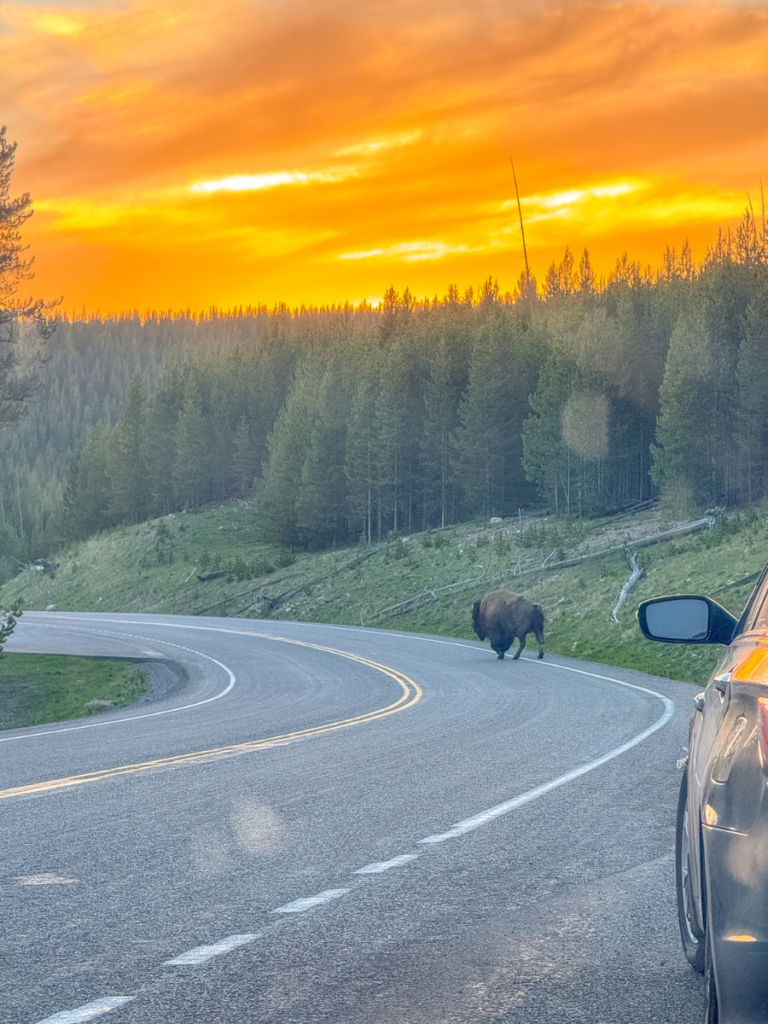
If an animal approaches you, back away. And if you see bison blocking the road (which happens a lot!), wait patiently and let them pass in their own time.
Please also stay on the boardwalks around the thermal features. The water in those pools can reach boiling point, and the ground around them is much more fragile and unpredictable than it looks. It’s genuinely dangerous.
💡 PRO TIP: Read my full guide on the biggest mistakes to avoid in Yellowstone before your trip. It’ll save you a lot of stress — and potentially a lot worse.
13. Download Offline Maps and a Music Playlist

Signal inside Yellowstone is patchy at best — and in some areas there’s no connection at all.
Before you enter the park, download an offline map of the area in Google Maps. It’s a lifesaver for navigating between the different basins and attractions when you’ve got no signal.
I’d also recommend downloading a music playlist in advance.
There’s something really special about cruising through Yellowstone with great music on — and you’ll want your tunes ready for the stretches where there’s no signal to stream anything.
💡 PRO TIP: Also download the NPS Yellowstone app before you arrive — it works offline, has geyser prediction times, trail maps, and all the information you need for the park. It’s completely free and genuinely useful.
I hope these tips help you have the most incredible trip to Yellowstone! It truly is one of the most magical places on earth, and June is such a wonderful time to experience it.
If you’re looking for more help planning your visit, check out everything you need to know before visiting Yellowstone, and don’t miss my Yellowstone packing list so you arrive fully prepared.